Introduction
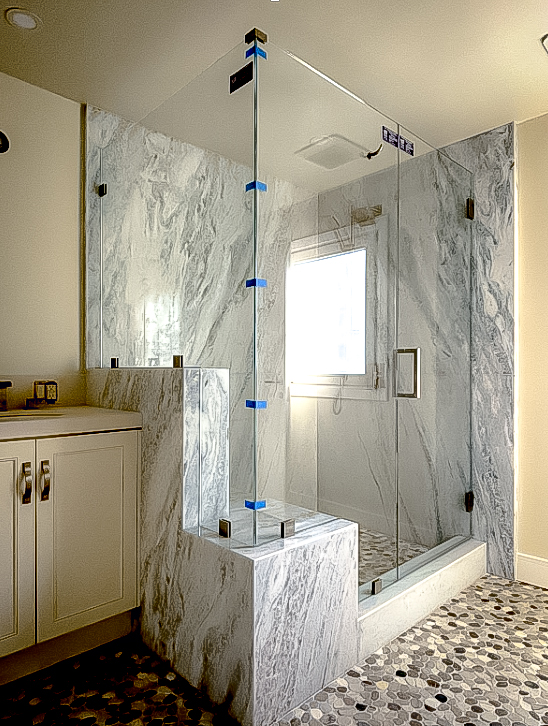
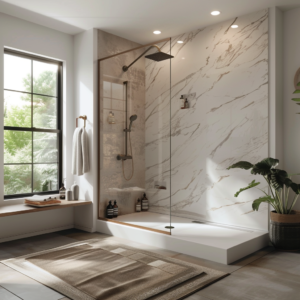
Transforming a traditional tub surround bathroom into a modern, sleek walk-in shower can significantly enhance both the aesthetic appeal and functionality of your space. This renovation not only updates the look of your bathroom but also adds value to your home by creating a more luxurious and accessible bathing experience. In this guide, we’ll walk you through the essential steps to achieve this transformation, from initial preparation to the final finishing touches. Whether you’re a seasoned DIY enthusiast or a first-time renovator, this step-by-step guide will provide you with the knowledge and confidence to undertake your bathroom makeover. Let’s get started!
Preparation
Protecting the Space
Before starting your project, it’s crucial to protect the surrounding areas to ensure a clean and safe workspace. Begin by covering the floor register with rags and placing the existing register back on to prevent debris and dust from entering the HVAC system. Protect your flooring by laying down ramboard and drop sheets from the entry point to the project area. Be cautious when using blue painter’s tape on hardwood floors; it can pull up the finish, so always test a small area first to ensure it doesn’t cause any damage.
Setting Up Workspace
For a project of this magnitude, you’ll need a nearby space, such as a bedroom, to store tools and materials required for the renovation. This will keep your work area organized and minimize clutter. Additionally, ensure you have adequate lighting in your bathroom. If the bathroom relies on an older wall sconce, consider temporarily replacing it with a bright LED light to help you see clearly throughout the project. Proper lighting is essential for accuracy and safety during the renovation process.
With the preparation complete, you’re ready to dive into the detailed steps of transforming your tub surround bathroom into a stunning walk-in shower.
Turning Off Utilities
Shutting Off Water
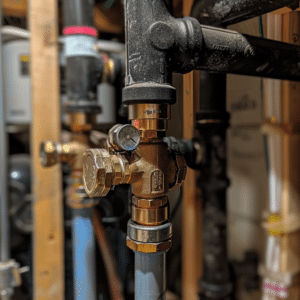
Before any demolition or plumbing work begins, it’s essential to turn off the water supply to your house. This ensures that you can work safely without the risk of water damage. Follow these steps to properly shut off and drain your water lines:
- Turn Off the Water Supply: Locate the main water shut-off valve for your home and turn it off.
- Drain the Lines: Open the lowest possible faucets in your house to drain any remaining water from the pipes. This step helps minimize water spillage when disconnecting plumbing fixtures.
- Remove Water from Toilet: Use a shop vac to remove any leftover water from the toilet bowl and tank. Remove the filter from the shop vac and use it to suck out both the bowl and tank.
- Disconnect the Toilet: Unscrew the nuts on either side of the toilet base that are holding it to the floor. If the nuts are seized, use a fine-tooth blade saw to cut through the bolt. Disconnect the water line, being prepared to catch any remaining water with a rag.
- Remove the Toilet: Some toilets may be caulked to the floor. If so, use a knife to cut through the caulk. Lift the toilet straight up to remove it, and place it out of the way.
With the water safely turned off and the toilet removed, you’re ready to start removing fixtures and beginning the demolition phase of your bathroom transformation.
Removing Fixtures
Disconnecting Plumbing
With the utilities safely turned off, the next step is to remove the existing fixtures, starting with the sink, vanity, and lighting. Follow these steps to ensure a smooth removal process:
- Remove the Sink:
- Disconnect the Plumbing: Begin by loosening the nuts on the sink trap and removing it. If your plumbing doesn’t have shut-offs, you’ll need to cut the water lines. Cap the lines temporarily to prevent any residual water from leaking.
- Cut the Water Lines: Use a pipe cutter to cut the copper lines, if necessary. Clean the ends of the pipes with an emery cloth and deburr the edges to prepare them for capping.
- Cap the Water Lines: Use shark bite end caps or similar fittings to temporarily cap the water lines. This will allow you to turn the water back on to the rest of the house while you work on the bathroom.
- Remove the Vanity:
- Detach from the Wall: Most vanities are secured with screws going into the wall framing. Locate these screws, typically near the top and bottom edges of the vanity, and remove them.
- Cut Any Caulk: Use a utility knife to cut through any caulk or sealant between the vanity and the wall.
- Lift and Remove: Carefully lift the vanity away from the wall, being mindful of any remaining plumbing connections or electrical components.
- Remove the Lighting:
- Turn Off Power: Ensure that the power to the bathroom is off. Verify this with a non-contact voltage tester.
- Remove the Light Fixture: Unscrew the faceplate of the light fixture to expose the wiring. Disconnect the wires by removing the wire nuts.
- Remove the Back Plate: Unscrew the back plate from the wall. If there is no junction box behind the fixture, this may require additional work later to install proper electrical housing.
- Install Temporary Lighting: To maintain good visibility, install a temporary light fixture with a bright LED bulb.
- Remove the Mirror:
- Detach from the Wall: Large mirrors are often held in place with adhesive and brackets. Score around the edges with a utility knife and gently pry the mirror away from the wall.
- Remove the Brackets: Unscrew any brackets securing the mirror.
With these fixtures removed, you’re ready to move on to the demolition phase, where you’ll remove the old tile and drywall to make way for your new walk-in shower.
Demolition
Removing Tile and Drywall
Now that the fixtures are out of the way, it’s time to tackle the demolition. This phase involves removing the old tile and drywall to create a blank slate for your new walk-in shower. Follow these steps to ensure a clean and efficient demolition process:
- Prepare for Dust Control:
- Use a Multi-Tool and Vacuum: Attach a vacuum to your multi-tool to minimize dust while cutting through tile and drywall. This will help keep the work area cleaner and safer.
- Score the Tile: Use the multi-tool to score along the edges where the tile meets the drywall. This will help you remove the tile and backer board in larger, more manageable chunks.
- Remove the Tile:
- Start with the Ceiling: If your bathroom has a tiled ceiling, start there for safety reasons. Score a line in the ceiling tile with a hammer and carefully pull down the tile and drywall. Use a pry bar or hammer to remove the remaining pieces.
- Work on the Walls: Once the ceiling is done, move to the walls. Cut through the silicone in the corners and edges of the tile with a utility knife. Use a pry bar or hammer to remove the tile and backer board. Pull it away from the wall in large sections to reduce dust and debris.
- Remove the Bathtub:
- Detach Fasteners: The tub is usually secured with fasteners along the flange. Use a sawzall or a pry bar to cut through or remove these fasteners.
- Lift and Remove the Tub: Carefully lift the tub at an angle and remove it from the bathroom. Be cautious of any remaining plumbing connections.
- Remove Drywall:
- Cut and Pry: Use a utility knife to cut through the drywall along the scored lines. Remove the drywall in sections, starting from the top and working your way down.
- Check for Hidden Issues: As you remove the drywall, inspect for any hidden issues such as mold, water damage, or structural problems. Address these issues before proceeding with the renovation.
- Clean Up:
- Dispose of Debris: Collect all the removed tile, drywall, and other debris and dispose of them properly. Renting a dumpster might be helpful for larger projects.
- Vacuum and Sweep: Thoroughly clean the work area to prepare for the next phase of the renovation.
With the demolition complete, you now have a clean slate to begin the exciting process of installing your new walk-in shower. The next steps will involve plumbing and electrical adjustments to accommodate your new fixtures and layout.
Plumbing and Electrical Adjustments
Reworking Plumbing
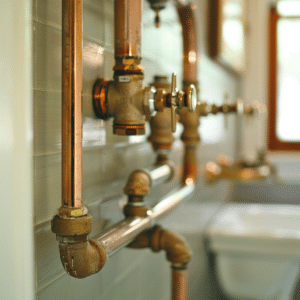
With the demolition complete, it’s time to focus on reworking the plumbing to fit the new walk-in shower configuration. Proper plumbing adjustments ensure that your new shower functions correctly and efficiently.
- Shut Off Water Supply:
- Ensure the water supply is still turned off before beginning any plumbing work.
- Relocate and Install New Plumbing Lines:
- Rework the Drain: Start by cutting the existing drain line and rerouting it to the center of the new shower area. Use a right-angle drill to make necessary holes in the studs to accommodate the new piping.
- Install the Shower Valve: Notch the studs if necessary to fit the new shower valve. Ensure it is at the correct depth by placing a 2×4 flat against the back of the framing. Secure the valve with screws, making sure it is level.
- Connect New Piping: Use PEX tubing to connect the new hot and cold water lines to the shower valve. Use a pipe cutter to cut the copper lines, clean and deburr them, and then use crimp rings to secure the PEX to the copper. Install hammer arrestors just below the shower valve to prevent water hammering.
- Install Blocking for Fixtures: Add wood blocking in the wall to support future fixtures such as the showerhead, handheld shower, and rain showerhead. Secure the blocking with screws to ensure it is firmly in place.
- Install Temporary End Caps:
- Temporarily cap the water lines with shark bite end caps. This allows you to turn the water back on for the rest of the house while you continue working on the bathroom.
Electrical Adjustments
Updating the electrical setup in your bathroom ensures that you have adequate lighting and ventilation for your new shower.
- Turn Off Power:
- Ensure the power to the bathroom is turned off at the circuit breaker.
- Install New Lighting:
- Remove Old Light Fixtures: Disconnect and remove any old light fixtures that will not be reused.
- Install Pot Lights: Drill holes in the ceiling for new pot lights. Run electrical wiring from the existing power source to the new light locations. Secure the pot lights in place and connect the wiring.
- Install a New Exhaust Fan: Replace the old exhaust fan with a new, more efficient model. Secure the fan to the ceiling joists and connect the ductwork. Ensure the wiring is properly connected and the fan is vented to the exterior.
- Add Electrical Outlets:
- Install New Outlets and Switches: If needed, add new outlets and switches to accommodate additional lighting or other electrical fixtures. Use a stud finder to locate and mark the positions for new electrical boxes. Run new wiring as necessary and secure the boxes in place.
- Temporary Lighting:
- Install a temporary bright LED light fixture to ensure adequate lighting throughout the renovation process.
With the plumbing and electrical adjustments complete, your bathroom is now ready for the installation of the new shower base and the subsequent steps in your transformation project.
Installing the Shower Base
Installing the shower base is a critical step in creating a solid foundation for your new walk-in shower. This process involves recessing the subfloor to accommodate a curbless shower base, ensuring proper drainage, and providing a stable surface for tiling.
Recessing the Subfloor
- Measure and Mark the Area:
- Determine the dimensions of your shower base and mark the area on the subfloor where it will be installed. Use a chalk line or a straight edge to ensure accurate measurements.
- Cut the Subfloor:
- Use a circular saw to make straight cuts along the marked lines. Set the depth of the saw blade to match the thickness of the subfloor to avoid cutting into the joists below.
- Along the edges where the saw can’t reach, use a reciprocating saw (sawzall) to finish the cuts.
- Remove the Subfloor:
- Carefully lift and remove the cut sections of the subfloor. This will expose the floor joists and allow for the installation of the recessed support structure.
- Install Support Framing:
- Attach 2x4s to the sides of the existing joists, creating a ledge for the new subfloor to rest on. Ensure the top of the 2x4s is flush with the top of the existing joists.
- Use construction adhesive and framing nails to secure the 2x4s to the joists. Double-check that they are level and properly aligned.
- Install New Subfloor:
- Cut new pieces of plywood to fit the recessed area. Apply construction adhesive to the tops of the 2x4s and set the plywood in place.
- Secure the plywood with flooring screws, ensuring it is flush with the existing subfloor. This creates a smooth, level surface for the shower base.
Installing the Shower Base
- Dry Fit the Shower Base:
- Place the shower base into the recessed area to check the fit. Ensure it sits level and that the drain hole aligns with the plumbing below.
- Make any necessary adjustments to the framing or subfloor to ensure a perfect fit.
- Prepare the Subfloor:
- Wet the subfloor with a sponge to prevent it from drawing moisture out of the thinset mortar.
- Apply a layer of thinset mortar to the subfloor using a notched trowel. Ensure even coverage to provide a strong bond for the shower base.
- Install the Shower Base:
- Place the shower base into the thinset, pressing it firmly into place. Use a rubber mallet to gently tap it down, ensuring it is fully embedded in the thinset.
- Check that the shower base is level and properly sloped towards the drain. Adjust as necessary to achieve the correct slope for proper drainage.
- Secure the Drain:
- Connect the shower drain to the plumbing. Apply plumber’s putty around the flange and tighten the drain assembly to create a watertight seal.
- Ensure the drain is securely attached and properly aligned with the shower base.
With the shower base securely installed, you now have a solid foundation for your new walk-in shower. The next steps involve waterproofing the shower area to prevent leaks and ensure long-term durability.
Waterproofing
Waterproofing your shower area is essential to prevent water damage and ensure the longevity of your new walk-in shower. Proper waterproofing involves sealing all seams, corners, and screw holes to create a watertight barrier.
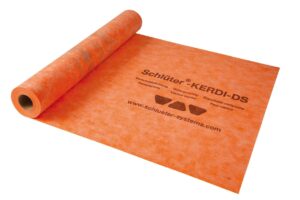
Applying Waterproof Membrane
- Prepare the Waterproofing Materials:
- Gather all necessary waterproofing materials, including thinset mortar, waterproof membrane (such as Kerdi or similar), and waterproofing banding for seams and corners.
- Mix the thinset mortar according to the manufacturer’s instructions, aiming for a slightly thinner consistency to ensure good adhesion.
- Apply Thinset to Seams and Corners:
- Use a notched trowel to apply thinset mortar to all seams, corners, and screw holes on the shower walls and base. Ensure even coverage and consistent direction of trowel lines.
- Cut the waterproof membrane banding to size and embed it into the thinset. Use a drywall knife to press the banding into the thinset, collapsing the ridges and removing any air bubbles.
- Be careful not to squeeze out too much thinset from beneath the banding, as this will compromise the waterproof barrier.
- Seal Screw Holes and Washers:
- Cut small squares of waterproof membrane to cover each screw hole and washer. Apply thinset to the area and embed the membrane squares into place.
- Press firmly with a drywall knife to ensure a tight seal, again collapsing any ridges and removing air bubbles.
- Waterproof the Shower Base:
- Place the waterproof membrane over the entire shower base, extending it up the walls by at least a few inches to ensure complete coverage.
- Apply thinset to the shower base using a notched trowel, then embed the membrane into the thinset. Use a rubber float to press the membrane down and smooth out any wrinkles or air pockets.
- Pay special attention to the corners and edges, ensuring the membrane is securely bonded to the thinset.
- Seal the Drain Area:
- Cut a hole in the waterproof membrane to fit around the shower drain. Apply thinset around the drain opening and embed the membrane into the thinset.
- Use a waterproofing collar or additional membrane pieces to seal the area around the drain, ensuring a tight, watertight seal.
- Waterproof the Walls:
- Apply thinset to the shower walls in sections, working from the bottom up. Embed large sheets of waterproof membrane into the thinset, overlapping seams by at least 2 inches.
- Smooth the membrane with a drywall knife, ensuring full coverage and eliminating any air bubbles or wrinkles.
- Reinforce Corners and Joints:
- Use pre-formed waterproofing corners and additional banding to reinforce all inside and outside corners, as well as joints between the walls and the shower base.
- Apply thinset to the corners and joints, embed the waterproofing elements, and smooth them out to ensure a complete seal.
With the waterproofing membrane properly installed, your shower area is now fully protected against water infiltration. Allow the thinset and waterproofing materials to cure according to the manufacturer’s instructions before proceeding to the tiling phase. This step is crucial to ensuring the durability and effectiveness of your waterproofing efforts.
Tiling
Tiling your shower is where the transformation really starts to take shape. The key to a professional-looking finish is careful planning, precise cuts, and consistent spacing. Here’s how to tile both the shower floor and walls.
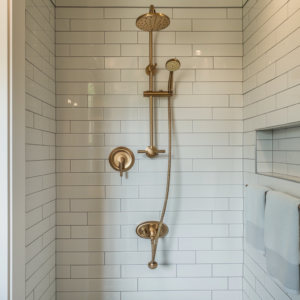
Tiling the Shower Floor
- Dry Fit the Tiles:
- Lay out your large-format tiles on the shower floor to determine the best fit and pattern. Mark any cuts that need to be made to fit around the drain and edges.
- Use a pencil to mark the location of the drain on the tiles.
- Make Relief Cuts:
- To accommodate the slope of the shower base, make relief cuts from the corners of the tiles to the drain. This allows the tiles to conform to the slope without cracking.
- Use a wet saw to make these cuts, then polish the edges with a grinder and a 200-grit polishing pad to ensure smooth, safe edges.
- Mix Thinset Mortar:
- Mix thinset mortar to a peanut butter-like consistency. Use a half-inch square notch trowel to apply it to the shower floor, ensuring consistent direction in the trowel lines.
- Install the Tiles:
- Back butter each tile with thinset to ensure strong adhesion.
- Begin with the tile pieces around the drain, pressing them firmly into the thinset. Use leveling wedges to maintain consistent spacing and minimize lippage.
- Continue laying tiles outward from the drain, ensuring proper slope toward the drain and consistent grout lines.
- Adjust and Secure:
- Use a level to check the slope and alignment of the tiles. Adjust as necessary before the thinset sets.
- Allow the tiles to set for the recommended time before walking on them or proceeding with grouting.
Tiling the Shower Walls
- Plan Your Layout:
- Determine the layout of your wall tiles, starting with the back wall. If you’re using large-format tiles, it’s often best to start with a full tile at the bottom and work your way up.
- To avoid having small, difficult-to-cut pieces at the top, consider starting with a cut tile at the bottom.
- Cut and Fit Tiles:
- Measure and cut tiles to fit around fixtures, niches, and edges. Use a wet saw for straight cuts and a grinder with a diamond blade for notches and curves.
- Dry fit the tiles to ensure proper fit before applying thinset.
- Apply Thinset to Walls:
- Use a notched trowel to apply thinset to the wall in manageable sections, starting at the bottom. Directionally trowel the thinset to ensure even coverage.
- Back butter each tile before pressing it into the thinset.
- Install the Tiles:
- Press each tile firmly into the thinset, using spacers to maintain consistent grout lines. Use a level to ensure the tiles are plumb and level.
- Continue tiling upward, row by row. Use a laser level or chalk lines to keep your rows straight.
- Tile Around Fixtures and Niches:
- Carefully measure and cut tiles to fit around plumbing fixtures and niches. Install these pieces with the same method, ensuring they are flush with adjacent tiles.
- For niches, consider using accent tiles or creating a pattern that complements the rest of the shower.
- Finish Edges:
- Use tile edging profiles to create clean, professional-looking edges where the tiles meet other surfaces. Apply thinset and press the profiles into place, then install the tiles over the edges of the profiles.
Final Checks
- Clean Excess Thinset:
- Use a damp sponge to clean any excess thinset from the surface of the tiles and grout lines as you work. This prevents hard-to-remove residue later.
- Allow to Set:
- Let the thinset cure for at least 24 hours before proceeding with grouting.
With the tiles securely in place, you’re ready for the final steps of your shower transformation: grouting, sealing, and adding the finishing touches. Proper tiling sets the stage for a beautiful, durable walk-in shower.
Grouting and Sealing
With the tiles installed and the thinset cured, the next step is to grout the tiles and seal all joints and edges to ensure a waterproof, durable finish.
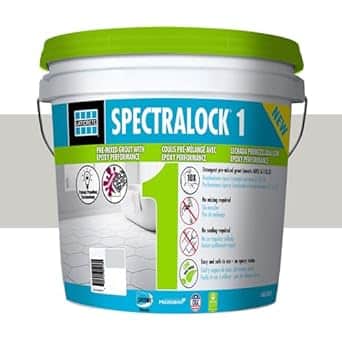
Grouting the Tiles
- Mix the Grout:
- Prepare the grout according to the manufacturer’s instructions. Use a drill with a mixing paddle to mix the grout to a smooth, peanut butter-like consistency.
- For this project, a light gray grout like Laticrete Permacolor in Frosty is a good choice, as it complements the tile color and provides a clean finish.
- Apply the Grout:
- Use a grout float to apply the grout, pressing it firmly into the grout lines. Hold the float at a 45-degree angle and spread the grout diagonally across the tiles to ensure full coverage.
- Work in small sections, applying grout and then immediately removing excess with the float.
- Clean the Tiles:
- After applying the grout, use a damp sponge to wipe away excess grout from the tile surfaces. Rinse the sponge frequently and ensure it is only damp, not wet.
- Move the sponge in a circular motion to smooth the grout lines and remove any haze from the tiles. Be careful not to remove too much grout from the joints.
- Final Cleaning:
- Allow the grout to set for about 20-30 minutes, then use a clean, damp sponge for a final cleaning. This helps to remove any remaining grout haze from the tile surfaces.
- After an hour, use a dry microfiber cloth to buff away any remaining haze.
Sealing the Grout
- Allow Grout to Cure:
- Let the grout cure for at least 24-48 hours before applying any sealant. This ensures the grout is fully set and ready to be sealed.
- Apply Grout Sealer:
- Use a grout sealer to protect the grout lines from moisture and stains. Apply the sealer with a small brush or applicator bottle, ensuring even coverage over all grout lines.
- Allow the sealer to penetrate the grout for the recommended time, then wipe away any excess with a clean cloth.
Sealing Joints and Edges
- Seal Change-of-Plane Joints:
- Use a color-matched silicone sealant to fill all change-of-plane joints, such as where the walls meet the floor and in the corners. This helps to accommodate any movement and prevent cracking.
- Apply a bead of silicone sealant, then smooth it with a finger or a caulking tool dipped in soapy water to create a clean, professional finish.
- Seal Around Fixtures:
- Apply silicone sealant around all plumbing fixtures, including the shower valve, showerhead, and any other penetrations in the tile. Ensure a watertight seal to prevent moisture from entering behind the tiles.
- Use painter’s tape to mask off areas around the fixtures for a neat application. Apply the sealant, smooth it, and remove the tape while the sealant is still wet.
Allow Sealant to Cure
- Drying Time:
- Allow the sealant to cure according to the manufacturer’s instructions, typically 24-48 hours. Avoid using the shower during this time to ensure the sealant sets properly.
- Final Inspection:
- Inspect all grout lines, joints, and seals to ensure they are properly filled and smooth. Make any necessary touch-ups before using the shower.
With the grouting and sealing complete, your walk-in shower is now fully waterproof and ready for the final touches. The next steps will involve installing fixtures, fittings, and any additional accessories to complete your bathroom transformation.
Installing Fixtures and Finishing Touches
With the tiles grouted and sealed, it’s time to install the fixtures and add the finishing touches to your new walk-in shower. This will bring both functionality and style to your renovated bathroom.
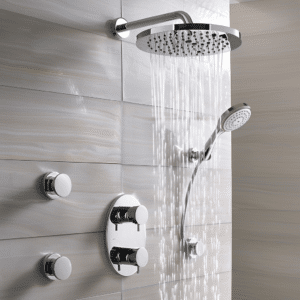
Installing Shower Fixtures
- Showerhead and Arm:
- Remove Temporary End Cap: Unscrew the temporary end cap from the shower arm stub-out.
- Apply Teflon Tape: Wrap Teflon tape around the threads of the shower arm to ensure a watertight seal.
- Install Shower Arm: Screw the shower arm into the wall fitting and tighten it with a wrench. Ensure the shower arm is pointing downwards.
- Attach Showerhead: Screw the showerhead onto the shower arm. Use a rubber gasket to prevent leaks and hand-tighten securely.
- Handheld Shower Unit:
- Remove Temporary End Cap: Unscrew the temporary end cap from the handheld shower stub-out.
- Apply Teflon Tape and Pipe Dope: Wrap Teflon tape and apply pipe dope around the threads of the handheld shower fitting.
- Install Bracket: Attach the bracket or holder for the handheld shower to the wall. Ensure it is securely fastened.
- Connect Hose: Attach the hose to the water supply fitting and the handheld shower unit. Tighten the connections securely.
- Shower Valve Trim:
- Install Trim Plate: Place the trim plate over the shower valve and secure it with screws. Ensure it is aligned correctly and tightly fitted against the wall.
- Attach Handle: Attach the handle to the valve stem and secure it with the provided hardware. Test the handle to ensure smooth operation.
- Rain Showerhead (if applicable):
- Install Rain Shower Arm: Screw the rain shower arm into the ceiling or wall fitting. Ensure it is secure and aligned properly.
- Attach Rain Showerhead: Screw the rain showerhead onto the rain shower arm. Hand-tighten and adjust the angle as needed.
Installing Vanity and Faucet
- Position the Vanity:
- Test Fit: Position the vanity in its designated spot and ensure it is level and fits snugly against the wall. Use shims if necessary to level the vanity.
- Secure Vanity: Attach the vanity to the wall using screws. Ensure it is securely fastened to the studs.
- Install Countertop:
- Apply Silicone: Apply a bead of silicone along the top edges of the vanity base.
- Place Countertop: Carefully place the countertop onto the vanity base, ensuring it is aligned correctly. Press down gently to secure it in place.
- Install Backsplash: If your countertop includes a backsplash, apply silicone along the back edge and press it firmly against the wall.
- Install Faucet:
- Insert Faucet: Insert the faucet through the pre-drilled holes in the countertop. Ensure the gasket is in place beneath the faucet base.
- Secure Faucet: From underneath the countertop, secure the faucet with the provided mounting hardware. Tighten the connections to ensure stability.
- Connect Water Lines: Attach the water supply lines to the faucet and the shut-off valves. Ensure all connections are tight to prevent leaks.
- Install Drain Assembly:
- Apply Plumber’s Putty: Apply a bead of plumber’s putty around the drain flange and insert it into the sink’s drain hole.
- Secure Drain Assembly: From underneath the sink, assemble the drain components, including the rubber gasket and nut. Tighten the nut securely.
- Connect P-Trap: Attach the P-trap to the drain assembly and the wall drain outlet. Ensure all connections are tight and secure.
Final Touches

- Install Mirrors and Lighting:
- Hang Mirrors: Position and secure mirrors above the vanity. Ensure they are level and aligned with the vanity and backsplash.
- Install Light Fixtures: Attach light fixtures above the mirrors or in designated spots. Connect the wiring according to the manufacturer’s instructions and secure the fixtures in place.
- Install Towel Bars and Accessories:
- Position Accessories: Determine the best locations for towel bars, hooks, and other accessories. Use a level to ensure they are installed straight.
- Secure Accessories: Attach the accessories to the wall using the provided mounting hardware. Ensure they are securely fastened.
- Final Cleaning:
- Clean Surfaces: Wipe down all surfaces, including tiles, fixtures, and countertops, to remove any dust or debris from the installation process.
- Polish Fixtures: Polish all fixtures and fittings to remove fingerprints and ensure a pristine finish.
- Test and Inspect:
- Check Fixtures: Turn on the water supply and test all fixtures for proper operation. Check for leaks and make any necessary adjustments.
- Inspect Seals: Inspect all silicone seals and grout lines to ensure they are intact and watertight.
With the fixtures installed and the final touches added, your walk-in shower and bathroom renovation are complete. Enjoy your beautifully transformed space, designed for both functionality and aesthetic appeal.
Final Inspections and Clean-Up
Before you can fully enjoy your newly renovated walk-in shower, it’s crucial to conduct thorough inspections and complete a detailed clean-up to ensure everything is perfect and functioning correctly.
Final Inspections
- Water Supply and Drainage:
- Turn On Water Supply: Turn on the main water supply and check all the newly installed fixtures for leaks. Inspect around the showerhead, handheld unit, and faucets.
- Test Drainage: Run water through all fixtures, including the shower and sink, to ensure proper drainage. Check for any signs of slow drainage or leaks around the P-trap and other connections.
- Sealant and Grout:
- Inspect Silicone Seals: Carefully inspect all silicone seals around the shower base, corners, and fixtures. Ensure there are no gaps or cracks and that the silicone is properly adhered.
- Check Grout Lines: Examine the grout lines on the shower floor and walls for any cracks or areas where grout may have pulled away from the tiles. Touch up as needed.
- Fixtures and Fittings:
- Test All Fixtures: Operate all fixtures, including the shower valve, showerhead, handheld unit, and faucet, to ensure they are functioning smoothly and without any issues.
- Check Shower Doors: If you have installed shower doors, open and close them to ensure they move smoothly and seal properly. Check for any gaps that could allow water to escape.
Clean-Up
- Remove Protective Coverings:
- Floor Protection: Remove any protective coverings from the bathroom floor and tiles. Be careful not to scratch or damage the surfaces.
- Fixture Protection: Remove any remaining protective film or covers from the shower fixtures, faucets, and other hardware.
- Clean Tiles and Surfaces:
- Wipe Down Tiles: Use a mild cleaner and a soft cloth to wipe down all tiles, removing any remaining grout haze or dust. Ensure the tiles are clean and shiny.
- Polish Fixtures: Clean and polish all fixtures, including the showerhead, faucet, and handles, to remove any fingerprints or smudges.
- Vacuum and Sweep:
- Remove Debris: Vacuum and sweep the entire bathroom to remove any dust, debris, or leftover materials from the renovation process.
- Clean Air Vents: Check and clean any air vents or HVAC registers to ensure they are free of dust and debris.
- Final Touch-Ups:
- Touch Up Paint: Inspect the walls and trim for any areas that may need touch-up paint. Use a small brush to correct any imperfections.
- Adjust Fixtures: Make any final adjustments to fixtures, mirrors, or accessories to ensure they are perfectly aligned and secure.
Enjoy Your New Walk-In Shower
With the final inspections and clean-up complete, your walk-in shower renovation is now officially finished. Take a moment to appreciate the transformation and enjoy your beautifully updated bathroom.
By following these detailed steps, you can ensure that your new walk-in shower is not only visually stunning but also fully functional and built to last. Happy showering!
HELPING TO IMPROVE SPACES
Affordable Frameless Shower Doors team of professionals brings decades of construction and home remodel experience to you living spaces. Attention to detail is vital for shower glass and we pride our selves on consistent and professional fabrication and install every time.

